
AD – contains gifts. Having spent eight years in our new build home now we keep wanting to change up our decor and add some practicality but without major costs usually associated with a full room overhaul, so when it came to the refreshing the bathroom we couldn’t afford and didn’t need to replace the suite or tiles. As much as I’d love some shiny white herringbone scales and a brushed gold shower it takes an awful lot of effort and cash! Plus when I don’t need something and I don’t hate it I just can’t bring myself to part with the cash nor is it very sustainable really.
Luckily past me chose neutral tiles which match the carpet in there so they didn’t need replacing.
On a side note who has carpet in their bathroom!?
Anyways, I quite enjoy having carpet but what we really didn’t enjoy was the sink in there. It would instantly let the running water splash back on us no matter what taps we tried. It’s been the biggest frustration and the main thing we knew we had to fix when refreshing the bathroom.

Luke was also getting fed up with all my Skincare, Haircare and various toiletries cluttering up the bathroom. So we decided to look for some storage to make it more practical and that started our refreshing a bathroom plan!
Installing a Vanity Unit
As we were looking for a sink and wanting more storage the obvious choice was to get a Vanity Unit. We looked at a couple of places and came across these fab reduced price cabinets at Bathstore – the rest was then history! We picked up the single cabinets for £29 each (was £109 each), the vanity unit for £52 ( was £175) and managed to source the double mirrored cabinet from eBay for £80 (RRP £169). The only thing we paid full price for was the sink (£139)- result as it doesn’t splash everywhere!


So I got allll the storage I wanted and more paying just £219 instead of £671. To break it up a little we’ve left the door off the front of one of the cabinets so I could add some pretty things to them of course…

Adding the Accessories
I had to have something to fill the shelves with of course so it was Accessories time. I can’t remember when I decided that concrete would be my texture of choice but as always I rolled with it. Adding something to the walls without having to repaint was important to me (mainly because I couldn’t be bothered!). I had a few gold and green wall ornaments I’d collected and some frames that I decided to add faux plant cuttings to.
My fave piece has to be this Next Trailing Plant £14.
I also added some


Changing the Colour Scheme
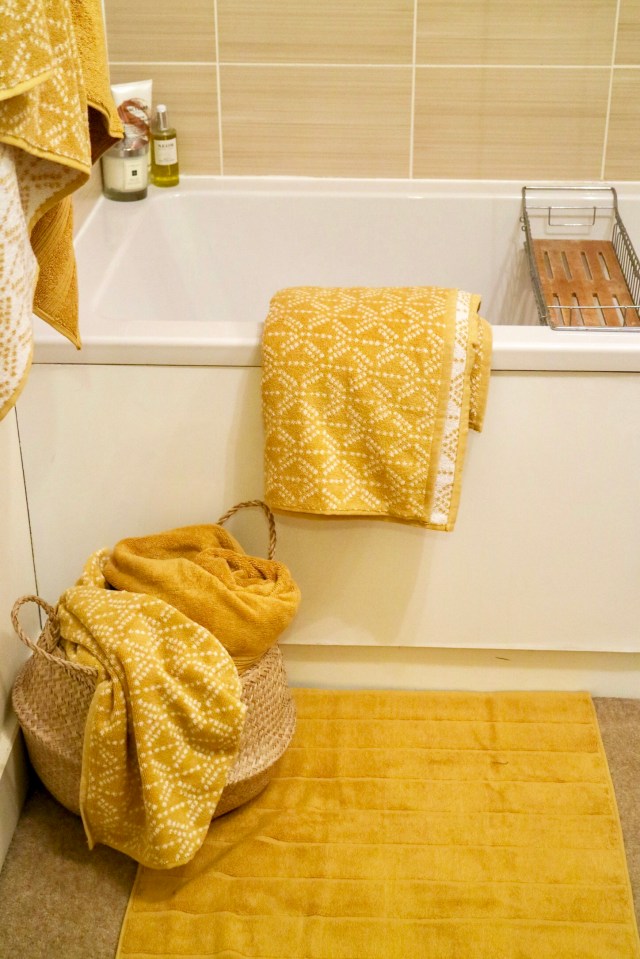
The next step was to get out of our previously very cream colour scheme. By adding a splash of colour with our textiles in there. Originally I was looking for green towels, to go with the green I’d added though faux plants. However after trialling a hand towel out for size I realised it just didn’t work for me. Luckily The Christy* team came to the rescue with their ochre towels and some other towels to go with the more concrete tones I’d already added. I picked these myself and the team gifted me them to help with this refresh!


- Siam Pebble Towels*
- Brixton Pebble Towels*
- Sloane Ochre Towels*
- Kimono Towels *
All towels gifted by Christy*.


Refreshing the bathroom in our new build was super easy and just look at how much it changed! I love a good before and after so here’s some before shots to finish off this post! I do think we need a new light though as these photos show it does cast a yellow hue. I’ve tried where possible to get rid of it, but if it affected the colour of anything else then I left it!
Let me know what you think in the comments below won’t you?


*Post may contain affiliate links, for further details please refer to my PR and Disclaimer Page in the menu above